Have you just received your new Celestron Travel Scope 70 telescope but feeling a bit overwhelmed about how set it up?
Maybe you can’t find the instruction manual that came with it!
Not to worry.
Setting up this portable telescope for the first time can seem daunting, but there’s no need to fret – this guide has got you covered.
In this easy-to-follow walkthrough, I’ll take you step-by-step through the entire assembly process.
I’ll share helpful set-up tips and tricks I’ve learned from my own experience putting this scope together straight out of the box.
Follow along as I take you through extending the tripod, attaching the optical tube, installing the diagonal, adding the eyepieces, and mounting the finder scope.
I’ll provide clear instructions that align with Celestron’s recommended setup routine.
Before you know it, you’ll have your Travel Scope 70 fully put together and ready to start exploring the cosmos and beholding celestial wonders.
Just a few straightforward steps stand between you and the stars.
Let’s get started!
How To Set Up The Celestron Travel Scope 70
The Celestron Travel Scope 70 is a portable and versatile beginner telescope. Setting it up properly ensures you get the most out of your stargazing sessions.
Follow these steps to assemble and use your Travel Scope 70.
Unpack and Protect the Equipment
When you first unpack your Celestron Travel Scope 70, it is essential to keep all of the protective packaging materials.
These can be used to store the optics when they are not in use.
Having this extra layer of protection can help extend the life of your telescope.
Set Up the Tripod
The tripod that comes with the Travel Scope 70 is pre-assembled, making setup very straightforward.
First, undo the clips on each of the tripod legs. Extend the legs to your preferred height, with a minimum height of around 16 inches.
Make sure to lock each clip securely to ensure stability.
When fully extended, the tripod has a maximum height of approximately 49 inches.
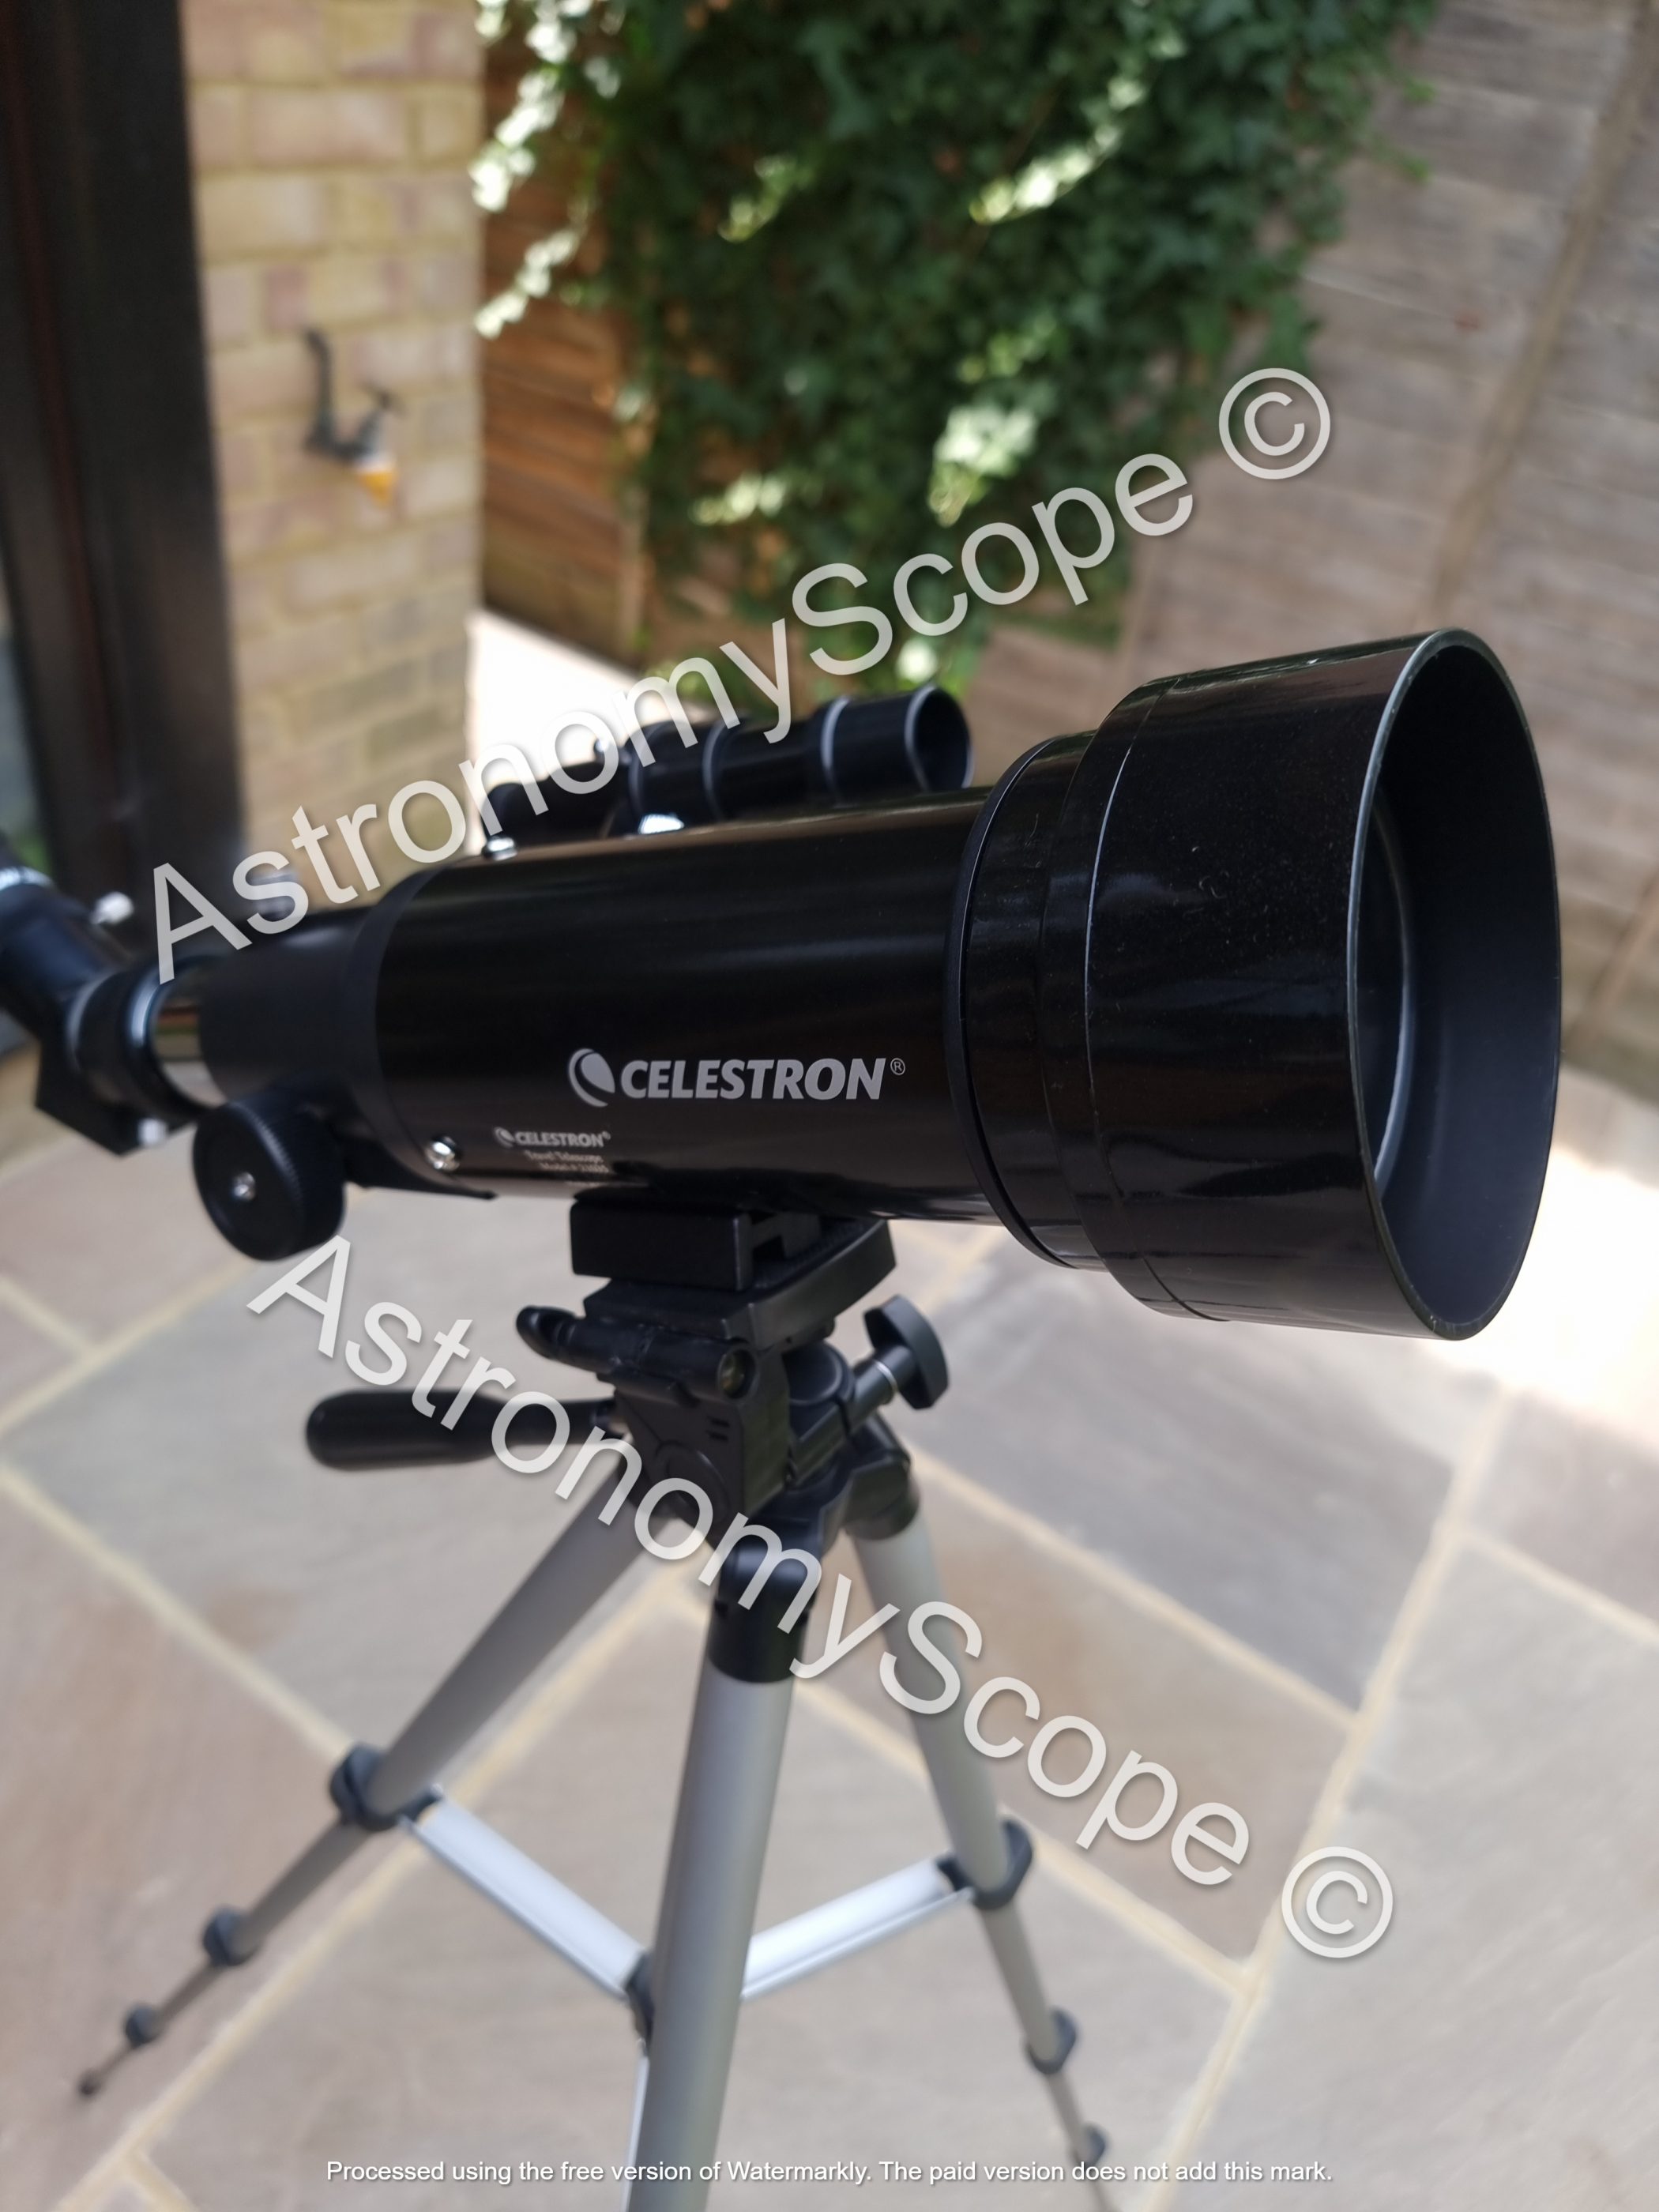
Attach the Optical Tube
Now it’s time to attach the optical tube to the tripod mount. Locate the part of the tripod that has a large lever and turn it anti-clockwise to release the mount.
Then, tighten it back into place to secure the mount.
At the top of the mount, you’ll find a small screw.
On the bottom of the optical tube, there are two threaded holes – you can use either one.
Align the optical tube with your chosen hole and screw it into the mount, making sure it is tightly secured.
Use the Alt-Azimuth Mount
The Celestron Travel Scope 70 comes with an alt-azimuth mount, allowing for easy point-and-shoot sky observation.
To move the telescope up and down, unscrew the lever on the mount anti-clockwise.
Once you have positioned the telescope where you want it, screw the lever back in to lock it in place.
To swivel the telescope left and right, use the small knob on the mount. When you have found your target, lock both levers to keep the telescope steady.
Install the Diagonal
The diagonal is a crucial accessory for comfortable viewing, as it directs the light at a 90 degree right angle to ensure you see objects the right way up.
Start by removing the protective caps from both the diagonal and the telescope itself. Unscrew the lever on the diagonal.
Insert the diagonal into the telescope’s focus tube, then screw the lever clockwise to securely attach it.
Add Eyepieces
To start observing, you’ll need to insert eyepieces into the diagonal.
Unscrew the eyepiece holder on the diagonal.
Take one of the eyepieces out of its protective case and insert it into the holder, screwing it in clockwise to secure it. Experiment with different eyepieces to achieve varying levels of magnification.
Install the Finder Scope
The finder scope is helpful for easily locating celestial objects.
Start by removing the protective caps from both the finder scope and the telescope. Unscrew the nuts on the optical tube of the telescope.
Place the finder scope on top of the optical tube, with the larger end facing outward. Screw the nuts clockwise to firmly secure the finder scope.
Align the Finder Scope
Properly aligning the finder scope is essential for accurate targeting of objects. Close one eye and look through the finder scope eyepiece.
Find a terrestrial object such as a bird or tree and center it in the crosshairs.
Use the adjustment screws on the finder scope to align the crosshairs directly with the object.
Make sure the object stays in focus when adjusting the focus knob.
Observe and Enjoy the Night Sky
With your Celestron Travel Scope 70 fully assembled and aligned, you’re ready to start exploring the night sky!
Take your time to practice how to navigate, focus, and locate interesting celestial objects.
Astronomy is a very rewarding hobby that becomes even more enjoyable the more you practice your skills.
Disassembly
When you are finished with your stargazing session, disassembling the telescope is straightforward.
Simply remove the accessories such as the finder scope, eyepieces, and diagonal in the reverse order from how you put them on.
Secure the optical tube to the mount and collapse the tripod legs, locking them in place. Carefully store all components in their protective packaging.
Following these steps will have you set up and stargazing in no time with your Celestron Travel Scope 70.
Refer back to this guide whenever you need a refresher. Happy observing!
FAQs
Is the Celestron Travel Scope 70 easy to set up?
Yes, the Celestron Travel Scope 70 is very easy to set up. It comes pre-assembled, and the process involves extending the tripod legs, attaching the optical tube, adding accessories like eyepieces and diagonal, and aligning the finder scope.
How Long Does The Celestron Travel Scope 70 Take To Set Up?
Setting up the Celestron Travel Scope 70 typically takes around 5-10 minutes. This includes extending the tripod legs, attaching the optical tube, installing accessories, and aligning the finder scope.
Do I need any tools to set up the Celestron Travel Scope 70?
No, you do not need any additional tools to set up the Celestron Travel Scope 70. It comes with all the necessary components, and assembly can be done by hand without any tools.
Related Guides:

Hey, my name is Jeremy. I’m a passionate and seasoned astronomer who loves nothing more than observing the night sky. I also love researching, learning, and writing all things Space and the Universe. I created Astronomy Scope to share my knowledge, experience, suggestions, and recommendations of what I have learned along the way while helping anyone to get into and maximize their enjoyment of the hobby.